Showing posts with label Gardening. Show all posts

Wednesday, March 28, 2012

We Have Bees!

Before I went to Williamsburg with the boys, The King and I had been watching Youtube videos on beekeeping.  We discovered what is called Top Bar Hives.  These hives are easier on the beekeeper's back and are most economical-something we look for.  By the time I got back, The King had a box ready for us.  Then about one month later, I got a call from a close friend that she had a swarm in one of her trees.  I asked her about the location and determined that I should be able to get it.  It was on a little branch low to the ground.  So I found a Youtube video on catching a swarm, got my cooler and kids, climbed in the van and took off!  I don't have photos of the process because we were all too hyped up (some were scared) to concentrate on that.  Here are some photos of the next couple of days after putting the swarm in my box.

Here was my bee outfit when I caught the swarm.  Swarms are very easy to handle and I didn't have any bee equipment anyway.  My husband got his hat and put one of my net laundry bags over it just so we wouldn't have to worry about the face area.  He wanted me to be all buttoned up in a jacket but I was too antsy to put all that stuff on.  I needed to feel free to move, plus I was brave at the time.  LOL  


Here is our top bar hive.  Do you see the blue cooler behind it?  That's how I transported the bees to our house.  I cut the whole branch off and put it in the cooler.  I had to wait a little while with the top open because some of the bees had started flying around.  I learned later that I could have sprayed them with sugar water to keep them more in a ball.  Anyway, The King took the top off the hive, put the branch in there, and then left the box open for the stragglers.  The side of the hive has a viewing window from plexiglass.  It is behind the wood panel on the side.

Just to be safe we fed the bees.  It was still late winter and we had moved them.  We wanted them to stay so we gave them a 50/50 solution of sugar water fed from hummingbird feeder.  Hey, it worked!

This view shows you the feeder in the front of the hive.  There are 5 entrance holes for the hive but we only had one open.  It was still chilly at night and we didn't want the new hive invaded by robber bees.  Having only one hole open, there is less entrance area for our bees to have to defend.  As the season goes on, we opened the other hole one by one until they were all opened.

There was a huddle of bees outside the entrance for a couple of days.  We still don't know why they do that but we were just glad they didn't leave.

Here is a view through the plexiglass.  We assume that the queen is in the middle of the huddle.  This is basically all we saw for about 2 weeks.  After that, we could see through the mass here and there bits of comb being built.

Here is Tigger wearing the hat and veil.  He felt comfortable around them especially in the beginning.  He's more wary again because both The King and I have bee stung since.  But it's ok, a few stings are good for ya!  Keeps the MS away.  LOL

   The next two photos were to capture the difference in the worker bees and the drones.  Drones are the males and they are bigger.


Transporting the bees in the van with 2 kids was interesting.  Even though I duct taped around the top of the cooler, there were still stragglers who could smell their queen and wanted in.  So there were a few stray bees flying around the back of my van--they stayed close to the cooler thankfully.  The boys seemed fine once I covered them with jackets and stuff for their heads.  It was an adventure!

We have not taken a class yet and we were too late to sign up for this year.  We have made and will continue to make mistakes I am sure.  We hope to sign up for the class starting in early 2013 where we will probably learn everything we did wrong.  :)

More of the story to come.....

Wednesday, February 22, 2012

Seed Organizing

I finally did it.  I finally organized my seeds.  This has taken me years.  I did some googling to see what methods were out there and I liked this one the best.  I made a few personal adjustments but for the most part, this is what some others have done.

My labels on the front of the bins are just index cards set inside the front area.  That way they can be changed out if need be.  I tend to freak out when doing a project if I'm not sure I want something to be permanent and then I don't do it.  This way allows me to have the label and yet feel comfortable in case of 'change' (oooo scary right?  Sometimes, even though you know you are ridiculous, you just can't help it.)

I tried to put paper clips on all of my packets so that when they are opened I already have the clip there to reclose.  Aren't I so smart?

I have some oddball packaging because of seed sharing.  I discovered that to firm up the packet I could staple the baggie to an index card and it stays in place better.

Works even better with the smaller baggies.  This is a jewelry bag by the way.  Those are great for storing small seeds.


Here are my three bins.  I bought more just in case because you know I want them all to match.  (rolling eyes)  Anyway, there are two for fruits and veggies and one for flowers and herbs.

Oh and here's a shot of my dividers.  Yep, in pencil so they can be 'changed'.  Ya gotta love a quirky mind!


Monday, January 30, 2012

Garden Update

Seeds planted a week ago:  WINTERSOWN

Broccoli
Cauliflower
Cabbage

Seeds planted Saturday, Jan. 28th--WINTERSOWN

Onion
Rhubarb
Rutabaga
Turnip
Lettuce (2 types)
Love in a Mist flower
Anise Hyssop herb
Petunia balcony mix
Spinach (2 types)
Beet
Endive
Celery
Radicchio

Seeds--DIRECT SOWN

Fava bean
Snow peas
Sugar Snaps

Chores Completed:

Pruned:  Shrub Rose, 2 Climbing Roses, Queen Elizabeth Rose
Some weeding of flower bed

Monday, January 23, 2012

Time Flies!

I spent the whole first part of January sick.  Bleh.  I'm finally feeling like a normal human being (even considering the fact that Tigger is sobbing due to having to do his morning routine-how that's different from any other day I don't know but there you have it).


This was the month that we started our drama class again.  We are doing a much shorter drama this year (thank heavens!) and so the pressure isn't as great for the instructors or the kids.  Our performance will be in May.

This past Friday we had one of our new science classes.  This year our co-op is doing 5 nature/science classes.  So far the response has been great.  I instructed this class and will try to do a post soon on how I put it together-links included.


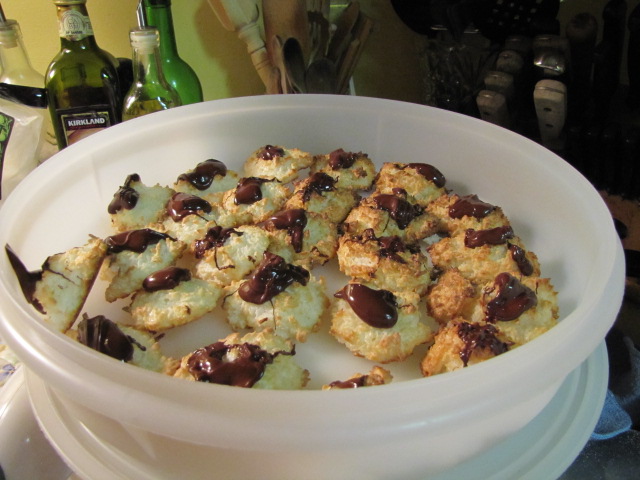
It's citrus season around here so I am trying my hand at preserving it in different ways.  I've done some lemon curd (which prompted cooking macaroons too--gotta use those eggwhites ya know!), lemonade and marmalade.  Since I enjoyed the lemon curd so much, I will be making more.  I made 30 jars of marmalade so far but will do more as I would like to gift some of them.

In gardening news (yes, there is still gardening going on around here), I have all my patio plants in my little greenhouse.  I managed to snag two dwarf citrus trees off the clearance rack at Lowe's at the end of the season-$7 each.  Woo Hoo!  So far they are both staying alive.  The Kumquat is doing ok but the little clementine tree is loaded with flowers.  I'm using blossom set spray on them hoping that I'll get some nice fruit.  I have about 16 grape tomato plants in there too--baby ones.  Ummm, more seed sprouted than what I expected.  I managed to start about 4-5 cilantro plants and I just repotted those on Saturday.  I also put out my broccoli, cabbage and cauliflower seeds into their little containers for 'Winter Seed Sowing'.  Hopefully, that will work out.  I still have different greens growing in the garden--mustard, collards, kale.  They are under 1 light row cover--it's all I had at the time.  Thankfully our winter has been mild so far.  Today The King is putting together some trellises for me from free wood he's gathered.  I need to get more things vertical for space this coming season.  My seed stash has been replaced by an order from Baker Creek Heirloom Seed Company.  I love them and their beautiful catalogs!

A reminder of good growing to come!
Oh!  About that photo above, it's supposed to be my 'cottage garden'.  It went wild this past year.  I had overgrown everything-the echinacea was popping up everywhere as were the shasta daisies.  The irises had formed huge dense rhizome systems.  I stripped everything out-and I do mean everything except for my roses and my clematis plant (I did cut that back).  I had so many extra plants that I gave some away and if the others survive I may trying selling them this spring.  We will see....  Also, I'm really hoping the garden recovers this year to look nice--it won't look as lush but maybe, just maybe it will still be pretty?  Here's crossing my fingers!  I guess if worst comes to worst I can stick in a bunch of annuals until the other stuff fills out again.

That picket fence we put up in the spring to try to prevent the dogs from getting in there.  They were still getting in but I think with an adjustment, we are keeping them mostly out.  We will be fencing them off into a dog pen/run this coming year as I am expanding my gardening range and want to keep them out of my beds.

Ok.  Enough for today.  Hope you all are doing well!

Monday, June 13, 2011

Patio Project

Last we brought home some dilapidated wicker furniture that had about had its day.   The cushions were disgusting so I tossed those.  One week during the fall I did my best to strip the wicker of its old paint using a type of wire brush The King got me from Lowes and the jet spray on my water hose.  It did a fairly decent job, but I soon realized there was no way I was going to get all that paint off. 

Then it got cold out and I sort of let it sit in limbo until this past month.  I used primer and a paintbrush to do the majority of it.  It takes a while.  Once that was done I started using white outdoor spray paint and did some of the tiny areas and grooves.  After that, I used an outdoor clear sealer and sprayed them all down.  I hope it holds fairly well.

Here is the new patio set up in all it's glory! 


 That's my rain barrel in the background.  It works wonderfully at helping me keep my patio plants watered.  The recent lack of rain hasn't been helping keep it full too well, though.
 That ac unit isn't going to be there permanently.

I haven't decided for sure yet what I'll be doing about new cushions.  The budget is tight right now, so I won't be paying $80-$100 for a new set of outdoor ones.  At best I'll get a nice set at a very good end of season price.  At worst, which really isn't that bad, is to get some cheaper indoor cushions and keep them in the greenhouse when we aren't sitting on them.  That will require me to have the memory to put them away after each outdoor jaunt.  Let's hope I find a good end of season sale. 

Wednesday, March 17, 2010

What's Growing Around Here

First I have to say that this year's greenhouse didn't produce much. I kept fighting whiteflies and the really awful aphid. A ladybug would have had a heyday in there if I could have found one. They literally suck the life out of the plants. I did get a few miniature size peppers and I have a couple of tomatoes coming, but that's about it.

See what I'm talking about? The pepper is still alive and growing a new leaf here and there, but it's pretty much just a waste of space. A big clean out is coming soon...


However, I haven't given up. I've planted quite a few seeds that are for this years garden and some of them are doing well. I think it helps that we've had some days reach close to 70 and that means I can open the door for ventilation. I'm hoping an early spring bug will find the smorgasbord and move in. So far the praying mantis sac that's in there still hasn't hatched.

Ok, so here's some of what I've planted: zinnias, chard, kale, tomatoes, eggplant, peppers, various flowers, huckleberries, ground cherries.

This is a tray of mostly flowers on the left side. You can see the calendula is up. On the right is I think are various things: Kiss Me Over the Garden Gate, Nasturtium, and the peppers/eggplants.

One success are the two cucumbers plants that survived their battle with the aphids. They are sporting some baby cukes! So exciting!!!

Here are the zinnias. There are doing ok. However, you can probably see that in the same tray there are a couple of 'cabbage' plants that just can't get a break. Again-aphid attack.

In the outside world of growing...There has been mostly just pruning going on. I have pruned my grape vines (hopefully the right way!), my rose bushes, my rose of sharon and my butterfly bushes.

I cut back the butterfly bushes more severely this time. They had grown to over 12 feet tall and were blocking sunlight from my little green arborvitaes. They were actually hanging over the fence into the driveway at one point this summer! You can already see how there is new growth coming. I may eventually replace most of these with blueberry bushes. We'll see.

Hark! What grows there? It is my garlic. Garlic is very hardy and survives the snow. I hope this spring isn't too wet though. Last spring's wet weather rotted some of the bulbs.
In the above picture you may also be able to see the seed papers I put down. I think I laid down about six of them. I'm not going back out there to count right now. It's only 6:30am!!! Anyway, these are papers I made in December watching TV with the family. They appear to work great! I went to check a couple of days ago and the radishes have popped up. I think I saw one little lettuce plant up already too. Beside the papers, I sprinkled some turnip seeds and those are very small but coming. I need to check everything later today. When the sun is up! LOL

I really recommend the seed papers. They were pretty easy to make and super easy to put down. You just smooth out the soil, put down your paper and cover it lightly with a bit of soil and straw. That's basically just to hold it down. You can already see how the paper is disintegrating from the weather and the effects of being in the soil. It's wonderful in that the seeds are already spaced correctly and they don't go anywhere when it rains or you water! That is fabulous!!!

The growing chores are just beginning. I have tons of transplanting to get done and even more outside work to do. This week I'm concentrating on getting control of my house and then I'll be back out there. Come on, everyone. It's Garden Report time!

Tuesday, January 5, 2010

Garden News

Despite the time of year and despite the cold temperatures, there is still garden news to report. Nothing outside, of course, it's the greenhouse and future planning that makes the news this time around.

First to report is the fact that I have several plants hanging out in the greenhouse. There are a bunch of pepper plants, 3 tomatoes, a pineapple sage, geraniums, mesclun mix lettuce and several other 'rescue' plants that I bought for .25 and .50 at Lowes at the end of the season. My hope for the rescue plants is for them to be used in containers come spring.

My myriad of pepper plants, tomatoes and geraniums.

The mesclun lettuce is coming right along!

This year's greenhouse season has been interesting so far. My plants have been invaded by whiteflies and aphids. I've even found some small, strange stick looking bug, a few leafhoppers, some ants and I have a praying mantis egg sac that was laid on a pepper plant before the adults disappeared. All the insects that are alive and moving around so far have been bad. I was hoping for the mantis sac to hatch but nothing yet. I did happen to find one ladybug in there today, but I believe the workload of eating all those aphids may be too much for one small ladybug. I have attempted to kill them with Neem spray and a soap spray but I'm also waiting on a special shipment of Green Lacewings to hatch and help with the problem. Once those hatch I won't be able to use my sprays. So, due to the pest infestation the plants you see here don't look as great as they should. I'm just glad they're still alive.

The mantis sac.


This year's luffas drying. They were a little late coming in this year so I had to pick them green. I hope to get them in earlier this year.

The other things I've done have to do with planning. I've actually done something pretty amazing for me--I've paper planned the spring and summer gardens! I'm not very good at planning on paper but this year I've turned over a new leaf. No pun intended. ;D I even have a Garden Notebook! In it are a few different sections: general garden info, vegetable planting plans, monthly to do lists for my local area (from the extension service), garden notes, specific plant info and greenhouse. For the vegetable planning, I have the back garden separated into about 19 sections and each one has it's own paper where I have drawn a grid. Beside the grid is the list of what I hope to plant with the date I hope to it in the ground.

Plans for Bed 4

Plans for Bed 11

Part of my plan is to include lots of flowers in a 'companion planting' scheme and just for general looks. Some of those flowers include lots of nasturtium (for supposedly deterring squash bugs--one can hope!) ; borage (to go with the potato plants); cosmos; french marigolds (general good bug attractant); calendula for eating; epazote (a mexican herb to be used in cooking); zinnias and more. I'd like the garden to come alive in 2010.

A sample of the flowers that may adorn my patio in the spring.

My seed orders for this year have been made and anything that isn't on hold for future shipment is already here. I shopped at Baker's Creek Heirloom Seeds, High Mowing Organic Seeds and Southern Exposure seed exchange. I've ordered some news things this year. Seeds for yellow strawberries, ground cherries, hardy kiwi, huckleberries and a watermelon that turns yellow on the outside when it's ripe. I love to try something new every year. I was supposed to try peanuts too but somehow in ordering I left it off. Oh well, there's always next year.

This tomato is already forming some flower buds.
My next seeds to start will be the cabbage and soon some other cole crops. Can you believe that next month the Sugar snaps are supposed to go in the ground already? There's not much of a break in gardening when you like to start plants from seed. See?!? Even in this weather there's Garden News.

Saturday, September 19, 2009

The Wrath of Grapes

I have to say that processing my 15 gallons of grapes was an interesting experience. It would have been lovely to have been able to take readers' suggestion of using a special steam pot to get the juice. Alas, I had no money to buy one and the grapes were waiting impatiently to be taken care of.

Here are my grapes. As you can see they are a white variety. I believe they were either mislabeled or came up from below the grafting area (if indeed these are grafted vines) because they have seeds and have a very muscadiney flavor. Which isn't what they're supposed to be. They do taste good though.

I was unprepared for the cleaning process. You'd think all you have to do is rinse them right? Oh no, once you start rinsing you realize that there are all sorts of insects that come crawling out of the centers. Earwigs, beetles and other 'things'. All my grapes were rinsed and double bathed in the sink. I gathered bunches of earwigs and threw them out. Can we just say a big "Ewwwww" together?

My first try at juicing the grapes was with this JuiceManJr. My theory (laugh, I know you want to) was that I would get the nutrition of the skin and seed along with the juice by using the juicer. Once again, I was unprepared for what happened. Seeds. Yes, the seeds were spitting out of the machine all over my kitchen. Evidently, this juicer isn't capable of handling the seed situation. You can bet I wasn't going to deseed 15 gallons of grapes. In addition, the bag that was holding the discards (grape waste), was actually very juicy still. I wasn't letting that juice go to the garbage! I will, however, be finding grape seeds throughout my kitchen for the next five years.

So I started boiling. I didn't take off the skins like most recipes say. Too much work for me. I just started boiling them and used my immersion blender to whip up the skins in the juice. It made the resulting juice cloudy but I felt better thinking I may have added a bit more nutrition to my juice and jelly. (Hey, if you know otherwise, don't tell me. Ok?)

And straining with the dreaded cheesecloth. (This is actually my tomatoes draining--I forgot to photo the grape mush draining.) My setup was a colander lined with several layers of cheesecloth over a clean 5 gallon bucket. Works great as long as you don't accidentally drop the colander into the bucket. Ask me how I know.

My reward. Several gallons of juice. This will be used for the jelly.

More in the freezer for drinking.

These are my bottles of grape cordial brewing away.

This cordial is from some red grapes that ripened about 6 weeks earlier. Can't wait for my cool winter evening when I pop open one of these!

I realized when getting this post ready that I never did take photos of my jelly. Oh well. I managed to get about 22 jelly jars full, plus 3 quarts of juice canned, plus what is in the freezer. It took two days (and I processed some tomatoes too). I'm a novice, what can I say? Would I do it again? In the phrase made famous this past year, "You betcha." As a matter of fact, my dinner tonight was a peanut butter and jelly sandwich made with MY jelly. Woo Hoo! LOL

The excitement never stops around here.

Friday, September 4, 2009

Off my groove for the day--Grape Harvest

Yesterday evening I finally got around to harvesting the grapes from my back fence. I should have done this about 2 weeks ago, but with our camping trip and all it just didn't happen.

I started by bringing a big soup pot out there to collect them with. Then after I cut about 5-6 bunches realized that I was going to need something a lot bigger. I grabbed an empty 5 gallon bucket. Within 5 minutes that was getting close to being full. The Latin King came to help and bring more buckets.

We ended up with three 5 gallon buckets of grapes! I couldn't believe it! That's my biggest harvest ever!

I bought these little grape vines at Lowes. I think they were mislabeled because they all have seeds in them, even though I KNOW some of the tags said seedless. Therefore, even though they have a good taste, the boys won't eat them. They are seed phobic, especially Pooh who doesn't eat strawberries because of the seeds on the outside.

What am I going to do with all those grapes? Whatever I do has to be fairly easy and uncomplicated since I'm really not into details. My brain stops functioning when the process is too complicated. So, last night I processed one bucket into glass jars for cordial. Very easy. I just smoosh the grapes (either with hand or masher), fill into jars, add Vodka, top them and sit them on my counter. Then for about 2 weeks (or until I get around to the next step) I'll turn the bottle over to give a little shake each day (or when I remember). After two weeks you strain out the juice, add some sugar to it and put it back into clean jars to sit for at least two months. I usually let mine sit until winter and then will break open a jar on a cold winter evening for a nice little glass of grape cordial. So good and so easy!

Something new I'd like to try this year is to make grape jam/jelly. I have a juicer and I read about juicing the grapes (seeds, stems and all some say--but I think I'm leaving out the stems) and then making the jam/jelly. I don't think this will turn out like regular jelly because 1. my grapes are white and 2. juicing them will probably make it a little thicker (I don't have much patience for cheesecloth). I'm going to try it and see how it works. At the very least I can freeze the juice for drinks throughout the year and/or making fruit leathers with my dehydrator.

So I'll be off my schooling groove for the day as I process 10 more gallons of grapes. Better get to it!

Wednesday, July 1, 2009

The Bubble Wrap Dance

You've heard many times how children will make toys out of boxes and whatever they find lying around. Here I present to you, The Bubble Wrap Dance...


They found this bubble wrap outside my little greenhouse. I had ripped it off the windows and thrown it on the driveway right before I started mulching. (It was waayyy to hot in there!) They had a grand ole time with it.